Installation
Before Installing Your IMPERMEABLE GreenJackets
Have Questions? Please Call Toll Free 888-786-2683.
Important Installation Considerations for Proper Utilization of the GreenJacket System!
Best case scenario would be for turf to be completely dormant and frozen before covering! Plan to cover before the first snowfall of the season, so hold off as long as possible to allow the turf to harden off and go dormant. We know that this may not be possible. If you have any questions about dormancy, you should plan to vent under the cover to exchange and replenish the air supply. This may be required (5 to 10 min) until the outside air temperature has fallen low enough to be sure dormancy has occurred. The fresh air supply will bring in cold air assisting this process and also exchange or flush out any anoxic gases with new oxygen. You will see the cover rise up giving you a positive indication that air is circulating under the cover. If Foam or AFS Insulation is also being used on your green, this will help in maintaining the cooler temps achieved by blowing air under the cover.
Do not cover over snow. Snow must be removed to prevent trapping in excessive moisture before covering. Soil moisture should be at a normal state. If moisture is in excess and pools around your shoe when walking across the green surface, this would be excessive and should be allowed to drain down through the soil profile away from the crown of the plant before installing the cover.
Once the soil is frozen and the turf Hardened Off, snow cover as we all know is a great insulator! However, If you will be installing the GreenJacket covers before the turf has hardened off and the soil is frozen, temperatures’ may still allow for turf to respire. You may have to blow air using a backpack blower to bring the colder air in which will help with the hardening off process as well as depleting any anoxic gases. As you do you will see a positive lift in the cover to confirm air circulation underneath. If you do not see the cover lift, you may need to remove the snow to prevent it from sealing off the turf to the air circulating under the cover.
Some areas may need to have “dams” built so water is redirected around the cover. You can use our Water Dam Tubing (see Accessories) cut to any length, filled with sand and tied off to redirect water around the green. Another popular option is to trench the covers edge into the ground using a edger shovel or trencher. This will then allow runoff water to flow up onto the top of the cover.
This will help to keep the cover down and secure in the event of high winds.
The GreenJacket material must be clean and dry. Reinforced tabs have a pressure sensitive adhesive backing. Pressure MUST be applied to secure them properly. Also if temperatures are 41°F or colder, you may need to warm up the adhesive backing to have them stick and secure properly. This can be done by the use of a hot air gun or by keeping the tabs in the cab of your truck warm until needed. Tabs are installed at MAXIMUM 4ft spacing around the perimeter edge of the cover. Do not place Reinforced Tabs and Nail stakes on a seam. If in a windy location you can increase tabs to every 2 feet for greater hold down. Since the GreenJacket comes new with the required amount based on every 4ft, you will need to order the additional amount for the windy location.
Stretch GreenJacket Cover out and secure with One Nail stake and washer per reinforced tab around the edge. Secure and stretch it as Tight As Possible.
Install the nail stakes at angles going away from each other when driving them through the vacuum preventer. This will reduce damage to the turf when removal in the spring. You may also choose to use only one nail stake through the Vacuum preventer. Be sure to cover with the repair tape to make a water-tight seal.
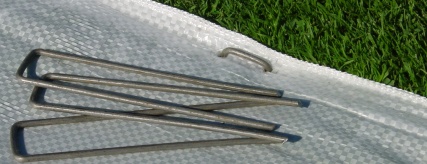
Sod staples may be added to secure the edges of the windward side of the cover. Simply fold the material over about an inch and place the sod staple through the folded section of the two layers.
Covers may be left down until the threat of freezing no longer exists. With GreenJacket, the light regulating film prevents over heating and over stimulating during the late winter and early spring temperature fluctuations.
We are recommending GreenJacket Insulating Foam on greens that are *poor draining or hold runoff water * greens that you know typically do not hold snow cover. * Greens that are exposed to heavy prevailing winds. (little or no wind protection)
We highly recommend installing the reinforced application tabs together with the Vacuum Preventer tabs. They will assist in preventing wind whip which may cause damage to the GreenJacket. You will notice seams in the GreenJacket which are every 6 feet across the width of the cover. This will help in locating the Vacuum Preventers on 18ft centers throughout the field area of the cover.
Grow – In PERMEABLE Installation Instructions
Stretch out the cover to be as tight as possible. Place one Sod Staple Every 3 feet around the perimeter edge of the cover. Make sure to place the staple in the fold-over edge area (see photo) so you are going through two layers of the folded section. Down each seam, place a Sod Staple every 10 feet down each seam.